
 |
| Altered Playing Cards |
I
.
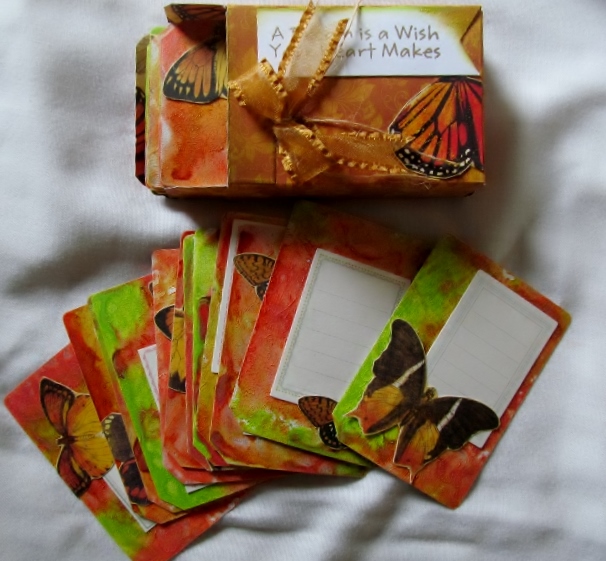
I love this set, inspired by BoBunny's Enchanted Harvest collection. The colors are fabulous and the butterflies big and bold.
This set was created for a bridal show. I wanted to present some ideas that were a bit out of the ordinary, and the thought came to me that guests could sign cards or tags instead of a traditional guest book. And - I happened to have a pile of unmatched playing cards.
So I grabbed a jar of Gesso and a paint brush and prepared the back of the playing cards, then followed that with Tim Holtz Distress Paints - I used "Twisted Citron" and "Abandoned Coral" and WOW - love the effect that settled on each separate card. When cards were completely dry I attached a white tag (found in my never-ending stash of odds and ends) on each and layered a single butterfly on a corner. The butterflies had all been cut from one sheet of cardstock.
With the same cardstock, I cut a box, using the reverse side as the cover. I added a stamped sentiment tag, bow and part of a cut-out butterfly peaking up from the bottom. FYI - I scored the sides of the box at 1/16 inch larger than what the pile of cards measured and it came out perfectly.
 |
| Butterfly Thank-You Card |
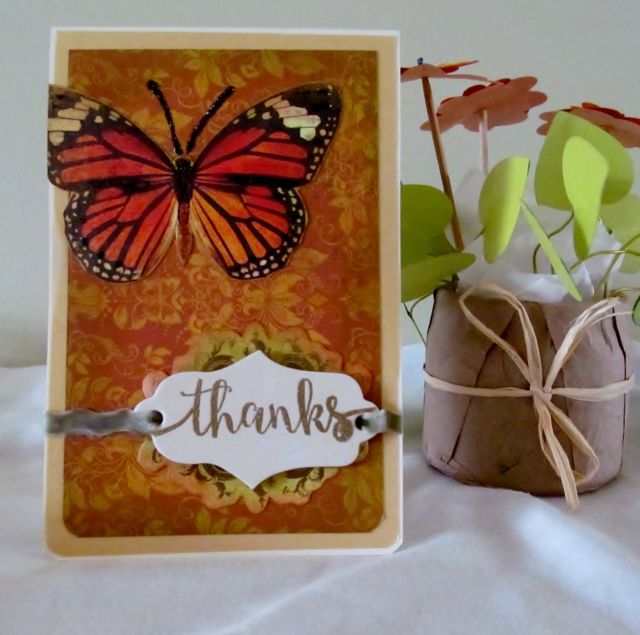
Next up, a thank you card created with the same paper. I backed it with gold colored vellum paper. Added a cut-out butterfly, a gold-foiled tag topped by a chipboard tag that was stamped and heat embossed in gold, and a velvet ribbon to pull it all together. The patterned paper, butterfly and foiled tag were inked around the edge with distress ink colors in Twisted Citron and Abandoned Coral. I just love this combination.
Yes, the flower barrel was also a paper project - maybe for another blog post!
Products used:
BoBunny cardstock, Bazzill Basics Cardshoppe Cardstock, Vellum paper from Worldwin Papers, Stamps from My Favorite Things and Avery Elle, Distress Inks, Distress Paints and Embossing Ink from Tim Holtz/Ranger, Studio Gesso from Ranger, WOW Embossing Powder, ribbon from American Crafts.
Products available on the web shop - www.scrapperscoveinvermere.net
Thanks for stopping by.
Products available on the web shop - www.scrapperscoveinvermere.net
Thanks for stopping by.


